Dari malam yang kau sampai kat jb, sampai la sekarang ni, saat ni, bumi johor bahru masih lagi dibasahi tangisan si awan yang seperti tiada penghujungnya. Aku cuma takot je tempat aku akan banjir.
hujan ni cam mengingatkan tentang diri aku, yang mana sedang bersedih gak. keseorangan, di dalam bilik, di temani ngan radio and chatter ntah sape yang aku kenal dari yahoo! chat. cam ni la malam2 aku. just bukak lagu, n online, g surf beberapa website, n g kat yahoo! chat. kalo bernasib baek, jumpe la lelaki yang ok untuk berbual sampai aku ngantok. keseorangan, x de pakwe, n nak msg member pon takot ganggu sebab diorang sume da de BF. camne?
Esok aku kene bangun awal pagi, nak gi jumpe doktor.. nak tanya tentang tonsil aku. aku x tau la..tapi tonsil aku makin lama makin teruk, sampaikan dia jadi sangat2 sensitif. even makan pedas sikit, makan bende panas sikit, terus cam nak sakit tekak. aku kalo leh, nak elakkan dari sakit tekak. sebab, ngan adanya tonsil, sakit tekak tu..walaupon bese je, die jadi teruk. aku da x tahan. da hampir dua tahun cam ni. ni mase nye untuk buang tonsil ni.
aku tau..tonsil ni bukan datang cam tu je. de sebab..dan ade hikmah nye. tonsil ni tetibe datang bukan saje sebab aku suke makan bende pedas, atau makan bende masam, atau suke makan bende yang panas2, tapi sebab keje aku dulu.
aku rase cam..aku x tau la. aku cam x leh trime diri aku. aku x leh trime fizikal aku, aku x leh trime masa silam aku, aku x leh trime kesilapan yang aku da wat selama ni. kengkadang aku terfikir, nape kengkadang de orang leh lepas kn je pe yg da berlaku. aku kalo leh..nak reverse balek pe yang da berlaku. sebab tu aku x leh nak trime pe yang da berlaku. kengkadang aku hampir boleh terfikir sama de aku ni gile @ pe. tapi pe yg penting sekarang, aku masih lagi waras.
x tau sampai bile aku x leh maaf kn diri aku. mungkin selama2 nya. mungkin sampai aku leh jumpe orang yang leh trime aku.

Sunday, January 30, 2011
Saturday, January 29, 2011
Make up brushes
Aku baru je sampai jb mlm tadi, and smlm tadi celebrate besday adek aku. and yang wat aku bengang sampai ari ni adalah nset aku ni. wat hal kot.. haiyaaa.. jadi la cam ni sayangku.. aku tengah x de duit ni, jangan la wat hal. (T_T)
ok, moving on to something that i want to write here. Ari tu aku da post tentang cara bermekap yang simple, tapi still nampak cantek. sekarang aku cam nak back-to-basic tentang mekap. x de la nak kembali blaja sejarah mekap, sebab aku da mention tentang tu. ni aku nak back-to-basic tentang apparatus of make ups.
Sesetengah orang boleh memakai mekap dengan jari, even aku pon pakai mekap pakai jari je, tapi kengkadang kite perlu untuk pakai something else cam brush untuk dapatkan kesan yang lebih menarik. sekarang aku, aku nak citer tentang berus yang digunakan dalam applying make ups.
berus mekap de terdiri beberapa jenis, yang ditentukan ngan saiz dan bentuk. di bawah adalah "must have" brush yang patut ade:
1. Foundation Brush (or Sponges)
Honestly, I don’t like using foundation brushes, I have like four of them (all from brush sets), and I prefer to use sponges or my fingers. But if you’re inexperienced or you simply want a fast, even and flawless application, then a foundation brush is a great brush to have.
2. Concealer Brush
You can always use your fingers to apply concealer, but a concealer brush gives a more precise application and it’s perfect for under eye concealing or spot touch ups.
3. Blush Brush
I can’t find a reason why not to have a blush brush. A lot of powder blushes don’t come with a blush brush and when they do they’re often too small and useless.
So for a natural, flawless application, it’s definitely worth investing in a good blush brush.
4. Bronzer Brush
You can use your blush brush to apply bronzer, but just like every powdered makeup, it tends to stay in the brush. So unless you’re okay with constantly deep cleaning your blush brush to remove all of the powder left by your blushes and bronzers, then I suggest you get a brush to use only for your bronzers.
When I used to apply my bronzer with my blush brush, I was never satisfied with the results that I got. The shade of my blush was always mixed with my bronzer and I just didn’t like how it looked.
I started using separate brushes for my bronzer and blush and I couldn’t be more convinced that one brush strictly for bronzers is the way to go. The shades are truer to their intended colors and I don’t have to deep clean my brushes as often.
5. Eyeshadow Brushes
No makeup wearer should be without a medium size eyeshadow brush. It’s a great brush to use when applying eyeshadow to your eyelid and the tip of the brush can be used to sweep shadow along the crease.
You will want to have a few of these brushes: the more the better. For starters, at least two is perfectly fine. Use one for light shades and a second one for darker eyeshadow shades.
6. Lash & Brow Groomer
This brush is perfect for shaping the brows, separating lashes, and removing any clumps of mascara or debris from your lashes. This is the easiest and least expensive brush.
7. Large Powder Brush
If you wear makeup at all, I recommend you get this one because it’s the only way you can get a light and even powder application. It’s VERY important to evenly distribute powder, because it’s the one makeup product that will help set your makeup, remove any shine from your face and create a smooth base for all of your other makeup.
8. Lip Brush

This brush is used for blending lip liner, lip colors and for lipstick application. Your lip brush should have a cap or be retractable so you can take it with you for touch ups.
You can also use Q-tips to apply your lipsticks and glosses but keep in mind that your lip makeup might not look as good.
*p/s: aku pon x de ke semua berus ni tapi satu ari nanti aku mesti akan ada kn. hehehe. sebab aku tau..brush ni sume penting. tapi masala budget, terpakse aku hold on kan dulu.
ok, moving on to something that i want to write here. Ari tu aku da post tentang cara bermekap yang simple, tapi still nampak cantek. sekarang aku cam nak back-to-basic tentang mekap. x de la nak kembali blaja sejarah mekap, sebab aku da mention tentang tu. ni aku nak back-to-basic tentang apparatus of make ups.
Sesetengah orang boleh memakai mekap dengan jari, even aku pon pakai mekap pakai jari je, tapi kengkadang kite perlu untuk pakai something else cam brush untuk dapatkan kesan yang lebih menarik. sekarang aku, aku nak citer tentang berus yang digunakan dalam applying make ups.
berus mekap de terdiri beberapa jenis, yang ditentukan ngan saiz dan bentuk. di bawah adalah "must have" brush yang patut ade:
1. Foundation Brush (or Sponges)
Honestly, I don’t like using foundation brushes, I have like four of them (all from brush sets), and I prefer to use sponges or my fingers. But if you’re inexperienced or you simply want a fast, even and flawless application, then a foundation brush is a great brush to have.
2. Concealer Brush
You can always use your fingers to apply concealer, but a concealer brush gives a more precise application and it’s perfect for under eye concealing or spot touch ups.
3. Blush Brush
I can’t find a reason why not to have a blush brush. A lot of powder blushes don’t come with a blush brush and when they do they’re often too small and useless.
So for a natural, flawless application, it’s definitely worth investing in a good blush brush.
4. Bronzer Brush
You can use your blush brush to apply bronzer, but just like every powdered makeup, it tends to stay in the brush. So unless you’re okay with constantly deep cleaning your blush brush to remove all of the powder left by your blushes and bronzers, then I suggest you get a brush to use only for your bronzers.
When I used to apply my bronzer with my blush brush, I was never satisfied with the results that I got. The shade of my blush was always mixed with my bronzer and I just didn’t like how it looked.
I started using separate brushes for my bronzer and blush and I couldn’t be more convinced that one brush strictly for bronzers is the way to go. The shades are truer to their intended colors and I don’t have to deep clean my brushes as often.
5. Eyeshadow Brushes
No makeup wearer should be without a medium size eyeshadow brush. It’s a great brush to use when applying eyeshadow to your eyelid and the tip of the brush can be used to sweep shadow along the crease.
You will want to have a few of these brushes: the more the better. For starters, at least two is perfectly fine. Use one for light shades and a second one for darker eyeshadow shades.
6. Lash & Brow Groomer
This brush is perfect for shaping the brows, separating lashes, and removing any clumps of mascara or debris from your lashes. This is the easiest and least expensive brush.
7. Large Powder Brush
If you wear makeup at all, I recommend you get this one because it’s the only way you can get a light and even powder application. It’s VERY important to evenly distribute powder, because it’s the one makeup product that will help set your makeup, remove any shine from your face and create a smooth base for all of your other makeup.
This brush is used for blending lip liner, lip colors and for lipstick application. Your lip brush should have a cap or be retractable so you can take it with you for touch ups.
You can also use Q-tips to apply your lipsticks and glosses but keep in mind that your lip makeup might not look as good.
*p/s: aku pon x de ke semua berus ni tapi satu ari nanti aku mesti akan ada kn. hehehe. sebab aku tau..brush ni sume penting. tapi masala budget, terpakse aku hold on kan dulu.
Friday, January 28, 2011
Thursday, January 27, 2011
Make up-how to apply it.
Aku rase aku da abes cover tentang sex education and right now, I'm moving to something that I like the most. Make ups.
In today's world, everybody is worried about how they look. However, looking great doesn't have to take too much time or effort. All you have to do is know what you're doing. Here's how to get your routine down pat! The steps are as follows:
1). Determine what type of skin you have
oily, combination, perfectly moisturized, dry, etc. Many cosmetic counters
have someone there that can do a preliminary analysis of your skin and recommend some products. If you are on a budget, see what the professional at the cosmetic counter recommends, then go to your local drug store and find a similar product for way less money!
2).Start with a freshly-washed face, (and hands, too).
Get a facial, or do one yourself. You want your face to be a clear and smooth canvas for you, the "artist," to do your art. Use a good deep-cleansing mask. Do not exfoliate if you have oily or sensitive skin. It will spread bacteria around your face from the already existing blemishes. Use antibacterial soap if you have acne. Also be sure that you replace the towel you use to dry your face every week. Lastly, apply toner by taking a cotton pad that has been dampened in warm water and sweep it over your face. Toner will restore the pH level of your skin and pick up any remaining dirt.
3). Massage a light moisturizer into your face no matter what skin type you have.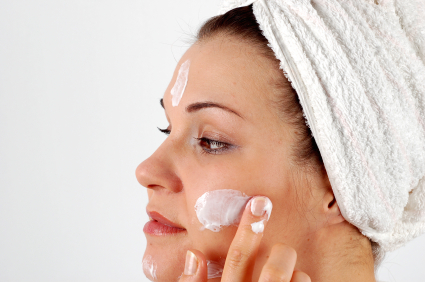
ALWAYS avoiding the eye area! You could also apply your moisturizer with your foundation brush or sponge if you have one. This will help oily skin dry, and dry skin become smoother. Wait a few minutes for it to soak into your skin.
4). Apply a foundation primer before you apply any foundation or tinted moisturizer.
The foundation primer will smooth out the skin surface,make applying foundation easier, and makes your makeup last longer.
5). Apply a sheer foundation that matches your skin tone.
Tip: If a liquid foundation has SPF in it, it's NOT good for taking flash photography. Use the ones without SPF instead if you don't want to look too flashed out on your face.
6). Wear illuminator to make your skin appear youthful and dewy compared with dull, matte makeup.
Skin illuminators come in powder, cream, mousse, etc. L'Oréal, Revlon, Neutrogena, and other brands make them - it's like make up with tiny particles that reflect light.
7). Apply concealer to any red or discolored spots.
In the corners of your eyes, where it's red, around the nostrils, and under the eyes (to make you look more awake) are good places for this. Do this after applying foundation, so you don't use too much. First apply the concealer, then pat very lightly with your finger to blend. Only apply concealer to the area that you want to conceal. Afterward, use the wedge to blend the concealer in with the foundation. Stand back away from your mirror to see if you have effectively concealed the areas. Try to stand about the distance away from the mirror that you stand away from people when you talk to them. Another way to conceal blemishes is to pat green concealer on the blemishes and red spots, then put foundation over top (the green reduces redness).
8). Apply a loose powder all over the face using a powder brush.
Pat it into the powder; then, with a paper towel, tap the brush so the excess falls off the brush. Lightly brush across the whole face. Use a powder puff (small) to apply powder on the upper lid. Apply a bronzer to your forehead, cheeks, and chin, to give a sun-kissed look,if wanted.
9).Highlight your brow bone,cheek bones and cupids bow by applying a light powder just below the brow, and to the highest part of your cheek.
10). Apply a small amount of blush to the apples of your cheeks.
Smile so you can see the apple of your cheek. Start the application at the apple and drag the blush outward toward your temple, following your cheek bone. Blend the color down a bit below your cheekbone in towards your earlobe.
11). Contour your face, especially if you have "hidden" cheekbones
To do so you will need a brown tone of powder, don't make it ultra brown, but a milk-chocolatey kind of color. Apply a it on the brush and apply it under your cheek bones, starting from the temple and going down until underneath the apple of your cheek. Don't make it too obvious as it's meant to look like a shadow. Then, on top of your cheek bones take a white or really light skin tone powder and apply it, right between your eye and your cheek bone, again until the temple, and voila! You have cheek bones!
12). Take a fluffy powder brush and blend everything together, so that there are no visible lines or excess powders.
13). Line your eyes.
Line it with a brown or soft black liner. For a more appealing look, apply liner with very light strokes to the upper lid, stroking toward the outer corner of the eye. To blend, use an angle brush. For a more natural look, dip the angle brush in some of your darker eyeshadow. Use a very light amount, or use the applicator tip. For the bottom lid, use a very light amount on the outer corner.
14). Put on the eyeshadow
Most eye colors come with two or three colors on the palette. The lighter color is for the lid. The darker color is for the crease on the lid, just below the eye bone. Apply the lighter tone first to the lid, spreading upwards to near the crease. For this, use the applicator that came inside the package. For the darker color, using your eyeshadow brush, dip into eye color and tap the brush to lose the excess. Apply inside the crease of the eye. You can find the crease by looking straight ahead. Your eye makes its own crease. Blend the color toward the outer corner of your eye. Sometimes you can blend it around to the bottom lid, but very lightly. The lightest color is for under the brow bone. Use the applicator to apply right on the brow bone just under the brow line. Make sure to use the larger eyeshadow brush to blend all the colors.
15). Use eyebrow pencil color that is very close to your natural eyebrow color
Here you just want to fill in missing areas. (It might behoove you to visit a makeup person that can arch your eyebrows correctly. If you've never done it yourself, have someone do it for you.) Your eyebrow should look very natural. If you do apply eyebrow pencil to any part of your eyebrow, use the angled brush to blend it into your brow with very light strokes.
16). Use a lash curler before applying any mascara.
There are several mascaras to choose from depending on the look you want. If you have short lashes, use a mascara that will add length... if you have thin lashes, use a volumizing mascara. Never pump your mascara brush in and out of the mascara. This causes air pockets. Dip the brush in the mascara once and lightly wipe off the excess onto a paper towel. Looking downward, apply to the top lash with upward strokes. Start with the inner part and work your way outward. Do both eyes with two coats, then let dry. After a few seconds, do the bottom lids. It's better to apply to the very outer part of the lash on the bottom lid. This will open your eye more. An inexpensive way to curl your eye lashes is to take the brush from an older mascara, and use it , after you've washed MOST of the mascara off.
17). Apply lip balm, primer, or sealer.
This will help make all lip products applied last longer and much more vibrant.
18). Line your lips with a liner that matches your lip color.
Make sure your lip liner pencil is sharpened, but not too sharp. Line around the natural line of your lips. Trying to create a fuller lip by dragging the lip pencil outside your lip line is for professionals. Usually it makes you look like you're just plain bad at applying makeup! After applying your lip pencil to your lip line, rub your lips together so the lip pencil color spreads inside your lips.
19).Apply lipstick or lip gloss with a brush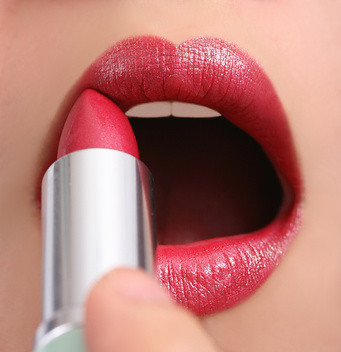 .
.
It will spread it evenly. It's a good idea to brush your lip brush in your lipstick, then some of your lip gloss for a nice light shine. Blot your freshly painted lips lightly with a tissue. This will make it last longer
20). Use a pressed powder to lightly powder the rest of your face, and the area under your eyes. Use very light pressure. Keep your pressed powder in your purse for touch ups.
*P/s: aku pon x de la apply sume steps ni. Tapi tu bukan sebab aku x nak, tapi sebab budget dan mase yang di peruntukkan unutk bermekap agk lame. dan aku sebagai student memerlukan mase yg sikit untuk bermekap. Oleh itu, aku just apply mekap yang senang dan yg penting..bagi aku la.
nevertheless, aku pakai mekap untuk kelihatan cantek untuk diri aku, bukan untuk orang len. lalu, perlukah aku untuk menghabiskan mase yang lame untuk memuaskan diri aku? oh, tidak. =P
In today's world, everybody is worried about how they look. However, looking great doesn't have to take too much time or effort. All you have to do is know what you're doing. Here's how to get your routine down pat! The steps are as follows:
1). Determine what type of skin you have
oily, combination, perfectly moisturized, dry, etc. Many cosmetic counters
have someone there that can do a preliminary analysis of your skin and recommend some products. If you are on a budget, see what the professional at the cosmetic counter recommends, then go to your local drug store and find a similar product for way less money!
2).Start with a freshly-washed face, (and hands, too).
Get a facial, or do one yourself. You want your face to be a clear and smooth canvas for you, the "artist," to do your art. Use a good deep-cleansing mask. Do not exfoliate if you have oily or sensitive skin. It will spread bacteria around your face from the already existing blemishes. Use antibacterial soap if you have acne. Also be sure that you replace the towel you use to dry your face every week. Lastly, apply toner by taking a cotton pad that has been dampened in warm water and sweep it over your face. Toner will restore the pH level of your skin and pick up any remaining dirt.
3). Massage a light moisturizer into your face no matter what skin type you have.
ALWAYS avoiding the eye area! You could also apply your moisturizer with your foundation brush or sponge if you have one. This will help oily skin dry, and dry skin become smoother. Wait a few minutes for it to soak into your skin.
4). Apply a foundation primer before you apply any foundation or tinted moisturizer.
The foundation primer will smooth out the skin surface,make applying foundation easier, and makes your makeup last longer.
5). Apply a sheer foundation that matches your skin tone.
Tip: If a liquid foundation has SPF in it, it's NOT good for taking flash photography. Use the ones without SPF instead if you don't want to look too flashed out on your face.
- To find the right one, go to the makeup counter at a local department store and have the artist there help you.
6). Wear illuminator to make your skin appear youthful and dewy compared with dull, matte makeup.
Skin illuminators come in powder, cream, mousse, etc. L'Oréal, Revlon, Neutrogena, and other brands make them - it's like make up with tiny particles that reflect light.
- Use a makeup sponge or wedge, starting around the hairline and working your way down. (Use the wedge for this routine because you can be more precise about where the make up goes.) If you want a proper look that looks as if it has been done by a professional makeup artist, try using a foundation brush.
- Remember to apply the makeup all the way down to your throat area and keep blending so you can't see where the make up ends. Nothing is worse than looking like you have a mask on your face!
- Around the eye area, do very light strokes inward, toward the inner corner of your eye. Don't apply it to your upper eyelid! All of the professional makeup artists say not to apply foundation to this area. This is why you need a foundation that matches your skin. If you want foundation to darken your skin then try putting it above your eyes, and see what you like. Be gentle with this part, because the skin is very delicate and sensitive here.
7). Apply concealer to any red or discolored spots.
In the corners of your eyes, where it's red, around the nostrils, and under the eyes (to make you look more awake) are good places for this. Do this after applying foundation, so you don't use too much. First apply the concealer, then pat very lightly with your finger to blend. Only apply concealer to the area that you want to conceal. Afterward, use the wedge to blend the concealer in with the foundation. Stand back away from your mirror to see if you have effectively concealed the areas. Try to stand about the distance away from the mirror that you stand away from people when you talk to them. Another way to conceal blemishes is to pat green concealer on the blemishes and red spots, then put foundation over top (the green reduces redness).
8). Apply a loose powder all over the face using a powder brush.
Pat it into the powder; then, with a paper towel, tap the brush so the excess falls off the brush. Lightly brush across the whole face. Use a powder puff (small) to apply powder on the upper lid. Apply a bronzer to your forehead, cheeks, and chin, to give a sun-kissed look,if wanted.
9).Highlight your brow bone,cheek bones and cupids bow by applying a light powder just below the brow, and to the highest part of your cheek.
10). Apply a small amount of blush to the apples of your cheeks.
Smile so you can see the apple of your cheek. Start the application at the apple and drag the blush outward toward your temple, following your cheek bone. Blend the color down a bit below your cheekbone in towards your earlobe.
- If you added too much color to the brush, use the clear side of your wedge to blend it in more until the color is faded out a bit. Your cheeks should have a hint of color. You don't want to look like a clown!
11). Contour your face, especially if you have "hidden" cheekbones
To do so you will need a brown tone of powder, don't make it ultra brown, but a milk-chocolatey kind of color. Apply a it on the brush and apply it under your cheek bones, starting from the temple and going down until underneath the apple of your cheek. Don't make it too obvious as it's meant to look like a shadow. Then, on top of your cheek bones take a white or really light skin tone powder and apply it, right between your eye and your cheek bone, again until the temple, and voila! You have cheek bones!
12). Take a fluffy powder brush and blend everything together, so that there are no visible lines or excess powders.
13). Line your eyes.
Line it with a brown or soft black liner. For a more appealing look, apply liner with very light strokes to the upper lid, stroking toward the outer corner of the eye. To blend, use an angle brush. For a more natural look, dip the angle brush in some of your darker eyeshadow. Use a very light amount, or use the applicator tip. For the bottom lid, use a very light amount on the outer corner.
14). Put on the eyeshadow
Most eye colors come with two or three colors on the palette. The lighter color is for the lid. The darker color is for the crease on the lid, just below the eye bone. Apply the lighter tone first to the lid, spreading upwards to near the crease. For this, use the applicator that came inside the package. For the darker color, using your eyeshadow brush, dip into eye color and tap the brush to lose the excess. Apply inside the crease of the eye. You can find the crease by looking straight ahead. Your eye makes its own crease. Blend the color toward the outer corner of your eye. Sometimes you can blend it around to the bottom lid, but very lightly. The lightest color is for under the brow bone. Use the applicator to apply right on the brow bone just under the brow line. Make sure to use the larger eyeshadow brush to blend all the colors.
15). Use eyebrow pencil color that is very close to your natural eyebrow color
Here you just want to fill in missing areas. (It might behoove you to visit a makeup person that can arch your eyebrows correctly. If you've never done it yourself, have someone do it for you.) Your eyebrow should look very natural. If you do apply eyebrow pencil to any part of your eyebrow, use the angled brush to blend it into your brow with very light strokes.
16). Use a lash curler before applying any mascara.
There are several mascaras to choose from depending on the look you want. If you have short lashes, use a mascara that will add length... if you have thin lashes, use a volumizing mascara. Never pump your mascara brush in and out of the mascara. This causes air pockets. Dip the brush in the mascara once and lightly wipe off the excess onto a paper towel. Looking downward, apply to the top lash with upward strokes. Start with the inner part and work your way outward. Do both eyes with two coats, then let dry. After a few seconds, do the bottom lids. It's better to apply to the very outer part of the lash on the bottom lid. This will open your eye more. An inexpensive way to curl your eye lashes is to take the brush from an older mascara, and use it , after you've washed MOST of the mascara off.
17). Apply lip balm, primer, or sealer.
This will help make all lip products applied last longer and much more vibrant.
18). Line your lips with a liner that matches your lip color.
Make sure your lip liner pencil is sharpened, but not too sharp. Line around the natural line of your lips. Trying to create a fuller lip by dragging the lip pencil outside your lip line is for professionals. Usually it makes you look like you're just plain bad at applying makeup! After applying your lip pencil to your lip line, rub your lips together so the lip pencil color spreads inside your lips.
19).Apply lipstick or lip gloss with a brush
.It will spread it evenly. It's a good idea to brush your lip brush in your lipstick, then some of your lip gloss for a nice light shine. Blot your freshly painted lips lightly with a tissue. This will make it last longer
20). Use a pressed powder to lightly powder the rest of your face, and the area under your eyes. Use very light pressure. Keep your pressed powder in your purse for touch ups.
*P/s: aku pon x de la apply sume steps ni. Tapi tu bukan sebab aku x nak, tapi sebab budget dan mase yang di peruntukkan unutk bermekap agk lame. dan aku sebagai student memerlukan mase yg sikit untuk bermekap. Oleh itu, aku just apply mekap yang senang dan yg penting..bagi aku la.
nevertheless, aku pakai mekap untuk kelihatan cantek untuk diri aku, bukan untuk orang len. lalu, perlukah aku untuk menghabiskan mase yang lame untuk memuaskan diri aku? oh, tidak. =P
Tuesday, January 25, 2011
Bergembira di SuperBowl di mid- Valley
Aku baru je pas balek berjalan ngna member cyber aku. 2 orang. sorang lelaki and seorang perempuan. quite menyeronokkan la. tapi seperti bese, kalo da menapak ni, da balek kat bilik mesti rase sakit kaki yang amat sangat. but then, it's worth.
aku rase cam nak upload je pic, tapi member pompuan aku tu tak bagi, ngan alasan yang terpaksa aku turuti. nak upload kat sini, takot lak orang len kenal aku ni sape. :P
di sebalik cter ni, terselit satu citer len. aku rase aku cam da menggile suke kat lelaki tu. seryesli...bile aku tengok de perempuan len komen die @ even die g trip ngan kawan satu ofis die, aku rse jeles gile. rase cam nak bunuh sume pompuan tu. tapi, on the other side, aku fikir..aku lom lagi kapel ngan die, means, aku x dapat lagi die, tapi aku da cam ni. cam ne kalo aku da kapel ngan die. msti aku akan kongkong die.
pe yang lagi wat aku rase teruk ngan diri aku, aku bukan dara, aku bukan budak pompuan yang baek. tapi aku menggile nak kan die. aku rase cam nak soh die tego aku, respon ngan aku, or else aku rase cam nak deactive je FB aku @ remove die dari friend list aku.. sedey sangat. aku x tau nak wat pe.
kawan aku soh aku kawal diri aku.. or aku akan end up ngna kekecewaan. die x bagi aku tengok FB laki tu..or even..respon komen die. come on....aku msti nak bebual ngan die dalam mase sehari.kalo x, aku akan jadi gile cam sekarang ni. mengade nye aku ni!!!!!
Monday, January 24, 2011
A reminder
bile da lame x bukak blog, aku semacam lupa ngan diri aku. lantas aku, cam..ntah la. try to make commitment. bile da bukak blog ni blek, br aku ingat blek sape aku. walaupon aku memang suke ngan mamat tu, tapi kalo die dapat tahu sape aku, masa lampau aku, adakah die akan terima?
x...aku x rse die akan terima. sebab aku terlalu hina untuk die. terlalu sangat2. x layak pon untuk sesape.
x...aku x rse die akan terima. sebab aku terlalu hina untuk die. terlalu sangat2. x layak pon untuk sesape.
Friday, January 21, 2011
Kamelia
Kamelia Ramli Sarip / Sweet Charity
Gugusan hari-hari
Indah bersamamu
Kamelia
Bangkitkan kembali
Rinduku mengajakmu
Ke sana
Inginku berlari
Mengejar seribu bayangmu
Kamelia
Tak pedulikan ku terjang
Biarpun harus ku tembus
Padang i lalang
Tiba-tiba
Langkahku terhenti
Sejuta tangan telah menahanku
Inginku maki
Mereka berkata
Tak perlu kau berlari
Mengejar mimpi
Yang tak pasti
Hari ini
Juga mimpi
Maka biarkan
Ia datang
Di hatimu
Di hatimu 7x
Tuesday, January 18, 2011
A very bery bad moment.
Everything got hard right now.
my knee is still not well, my study is not good,
even my tonsillitis is coming back.
Last night i was checking my inbox, when i noticed he was online.
I just...go out from there as soon as i saw him.
he's not gonna talk to me. there is nothing to talk about.
and i don't want to talk to him, because i know, it's gonna kill me.
i just..i don't know what to do. i don't.
Wednesday, January 12, 2011
Come back down to earth
A guy that you think was different for a month ago, is suddenly become not to different from other guy that you ever know. a guy that you think he cares about you, it turns out that he doesn't really care, or did he?
the point is, all the sweet relationship has ended. and the reality has started now. I feel quite sad about what had happen, but then i tried so hard to make it right, but then..it's all have to come back to basic things.
when i think about it back, it's not that i can't live without him. but, actually, i;m hiding from the truth. it turns out that, i'm not afraid of losing him or anything. but, i;m afraid of my life. my study. thing isn't going great now, and i need smthing to cover up. the thing is...no matter i tried to cover it up or run away, i still have to face it. i don't think i have that strength to face it.
Subscribe to:
Posts (Atom)